

Hey there! As a supplier of Cryo Fat Freezing Machines, I'm super excited to walk you through the installation process of these amazing devices. Whether you're a spa owner looking to expand your services or an individual wanting to take control of your body at home, understanding how to install a Cryo Fat Freezing Machine is crucial.
Getting Ready for Installation
Before we jump into the actual installation steps, it's important to make sure you've got everything you need. First off, find a suitable location for your machine. It should be a clean, dry area with enough space around it for proper ventilation. You don't want to stick it in a cramped corner where it can't breathe!
Check the power requirements of the machine. Most Cryo Fat Freezing Machines need a stable power supply. Make sure the electrical outlet you're planning to use can handle the voltage and amperage specified in the machine's manual. It's always a good idea to use a surge protector to safeguard your investment from any sudden power spikes.
Also, gather all the tools you'll need for the installation. Usually, it's just basic stuff like a screwdriver and maybe a wrench. But double - check the manual to be sure.
Unpacking the Machine
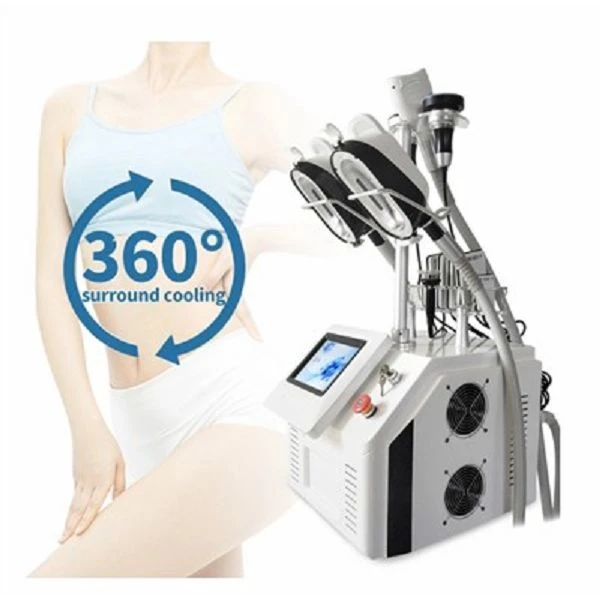
Once you've got your spot and tools ready, it's time to unpack the Cryo Fat Freezing Machine. Carefully open the box and take out all the components. There should be a main unit, applicators, cables, and a user manual. Inspect each part for any visible damage during shipping. If you notice anything wrong, contact our support team right away.
The user manual is your best friend here. It'll have detailed diagrams and instructions specific to your machine model. So, keep it close by as you go through the installation process.
Connecting the Components
Now, let's start putting the machine together. First, connect the applicators to the main unit. There are usually connectors at the back of the main unit and on the applicators. Make sure they fit snugly and are properly aligned. You might need to use a little force, but don't go overboard. If it doesn't seem to fit right, check the manual again.
Next, connect the power cable to the main unit. Plug the other end into the surge - protected outlet. Don't turn on the power just yet; we've got a few more steps to go.
Some Cryo Fat Freezing Machines also require a connection to a water source. If yours does, find the water inlet on the machine and connect the appropriate tubing. Make sure it's tightly secured to prevent any leaks.
Software Installation (if applicable)
Many modern Cryo Fat Freezing Machines come with software that needs to be installed on a connected device, like a tablet or computer. If this is the case for your machine, follow the instructions in the manual to download and install the software.
You'll usually need to connect the machine to the device via a USB cable or Wi - Fi. Once connected, open the software installer and follow the on - screen prompts. It might take a few minutes, so be patient.
Initial Setup and Calibration
After all the components are connected and the software is installed (if needed), it's time to turn on the machine. Flip the power switch, and wait for it to boot up.
Once the machine is on, you'll need to go through the initial setup. This might involve setting the language, date, and time. Some machines also have a calibration process to ensure accurate temperature control.
During calibration, the machine will run a series of tests to make sure it's operating at the right temperature. It's important to let the machine complete this process without interruption. The manual will tell you how long it should take and what to expect.
Testing the Machine
Once the setup and calibration are done, it's time to test the Cryo Fat Freezing Machine. Select a test mode on the machine or software. This will activate the applicators and start the cooling process.
Place a test pad or a small piece of fabric on the applicator to simulate a treatment. You should feel the cold temperature within a few minutes. If the machine doesn't seem to be cooling properly or if you notice any strange noises or error messages, refer to the troubleshooting section in the manual or contact our support team.
Safety Checks
Before you start using the machine for actual treatments, it's crucial to perform some safety checks. Make sure all the cables are properly connected and not frayed. Check the water connections (if applicable) for any leaks.
Inspect the applicators for any damage or signs of wear. The safety of your clients or yourself is our top priority, so don't skip these checks.

Conclusion and Call to Action
So, there you have it—the installation process of a Cryo Fat Freezing Machine. It might seem a bit daunting at first, but if you follow the steps in the manual and take your time, you'll have it up and running in no time.
If you're interested in purchasing a Cryo Fat Freezing Machine, we've got a great range of products to choose from. Our Cryo Weight Loss Machine is perfect for those looking to shed some extra pounds, while our Cellulite Reduction Machine can help smooth out those stubborn cellulite areas. And if you're into the latest technology, our Electric Cryotherapy Machine is a must - have.
If you have any questions about the installation process or our products, don't hesitate to reach out. We're here to support you every step of the way. Whether you're a newbie in the beauty industry or a seasoned pro, our Cryo Fat Freezing Machines can take your treatments to the next level.
References
- Manufacturer's user manual for Cryo Fat Freezing Machine
- Industry best practices for cryotherapy equipment installation